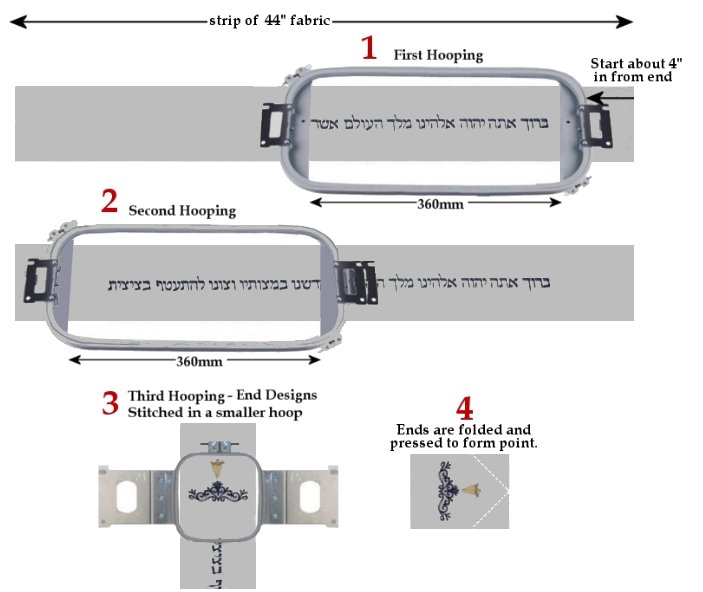
The embroidery machine I use is considered “semi-commercial” and has ten needles. I have many sizes of hoops in order to select the best one for the project. Except for jumbo designs such as jacket backs, the largest hoop is 360 mm x 200 mm, with a maximum sewing field of approximately 13″ x 8.” An atarah blessing must be stitched in one continuous line and text contains more letters than will fit in a 13″ area. Therefore, the fabric must be moved, the text re-aligned at the baseline and and re-hooped — in some cases, 3 times. The photo below will give you an idea of the process.
As you can see, based on the type style and size of the text, only part of the text will fit. The rest of the blessing is done in the second hooping. End designs are stitched the third time and then the excess fabric is trimmed evenly on both sides, folded and pressed. An outline or decorative stitch cannot be done at the top and bottom because even a 1 mm difference in re-alignment will be enough to make the continuation not match up.
In order to have enough fabric for re-hooping and trimming, DO NOT pre-cut your fabric. You will have to send me a 6″ high strip that is the full width of the bolt (usually 44″.)
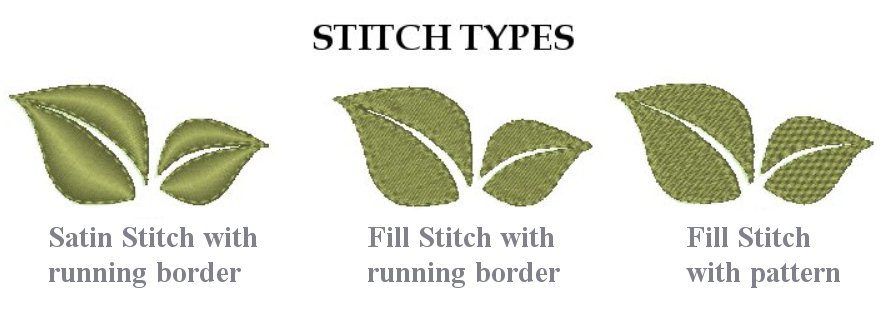
The subject of stitch types has come up pretty often, so here’s some information that should help you decide on what type of stitch will look best for your design.
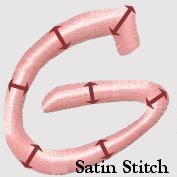
A satin stitch is a series of straight stitches taken right next to each other, close enough to cover the fabric underneath, but not too close as to butt up next to each other and cause bumps. The idea of satin stitch is that your stitches look smooth, like satin. One of the jobs of the digitizer is to plan what direction the satin stitches go. A number of factors are involved such as overall density of the design and what type of fabric it will be sewn on. Notice how the stitches change direction as it goes around the letter. The only real downside to satin stitching is using it on a large area. The stitches are long and can catch or snag so a fill stitch is preferred. Here’s an example of a satin stitch:
A fill stitch (very much like its name) fills an area with smaller stitches. It is denser than a satin stitch and can have lots of patterns assigned to it.
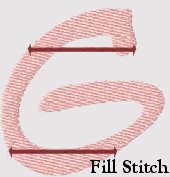
Here is a heart with the fill stitch:

Here is a leaf design with three different fills which each give it a new look: